
10.メインメニュー画面
メインメニュー画面
メインメニュー画面は、画面にボタンを配置して、そのボタンをクリックした時に別の画面へ遷移するという仕組みです。下記の例ではボタンが7つ配置されています。ボタンがクリックされた時のアクションも画面のXAMLに書かれています。
Window2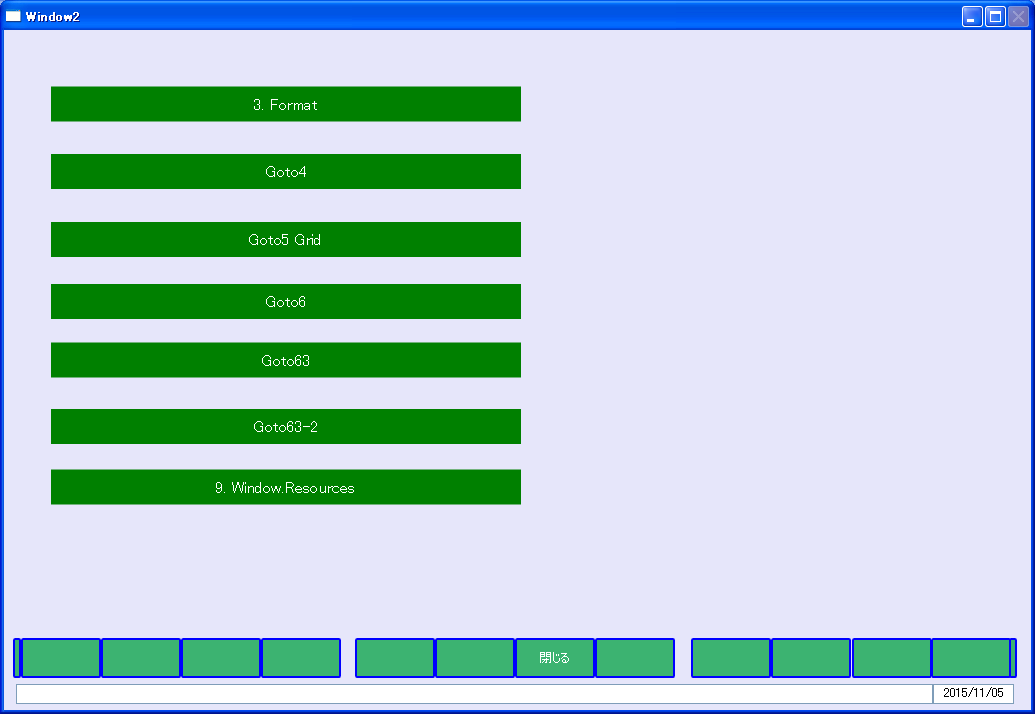
ZAML
ボタンのコードは下記のとおりです。Interaction.TriggersとButtonの部分です。CommandはGotoCommand63です。
(抜粋)
<i:Interaction.Triggers>

   <l:InteractionMessageTrigger
      MessageKey="MessageKey63" Messenger="{Binding Messenger}">
      <l:TransitionInteractionMessageAction
          WindowType="{x:Type v:Window63}" Mode="Modal"/>
      </l:InteractionMessageTrigger>

    </i:Interaction.Triggers>

<Button Command="{Binding Path=GotoCommand63}"
    Content="Goto63" FontSize="16"
  Width="470"  Height="35" Margin="40,310,503,330"
    Foreground="White" Style="{StaticResource CommandTemplate}" />
ViewModel
メインメニューのViewModelのCommand(GotoCommand63)に対応するICommandは、LivetのViewModelCommand(Goto63)で処理しています。
public ICommand GotoCommand63
{
   get { return new Livet.Commands.ViewModelCommand(Goto63); }
}
public void Goto63()
{
   Messenger.Raise(new TransitionMessage(new ViewModel63() {NeedHideOwner = true},
                                                              "MessageKey63"));
}