
8.画面遷移
MVVMの画面遷移
MVVMのWPFの画面遷移の基本(基礎)は下記の「画面遷移の骨格」を読んで理解してから、これからの解説を読んで下さい。 (ソースのダウンロードが出来ます)
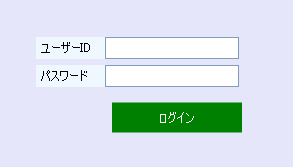
画面
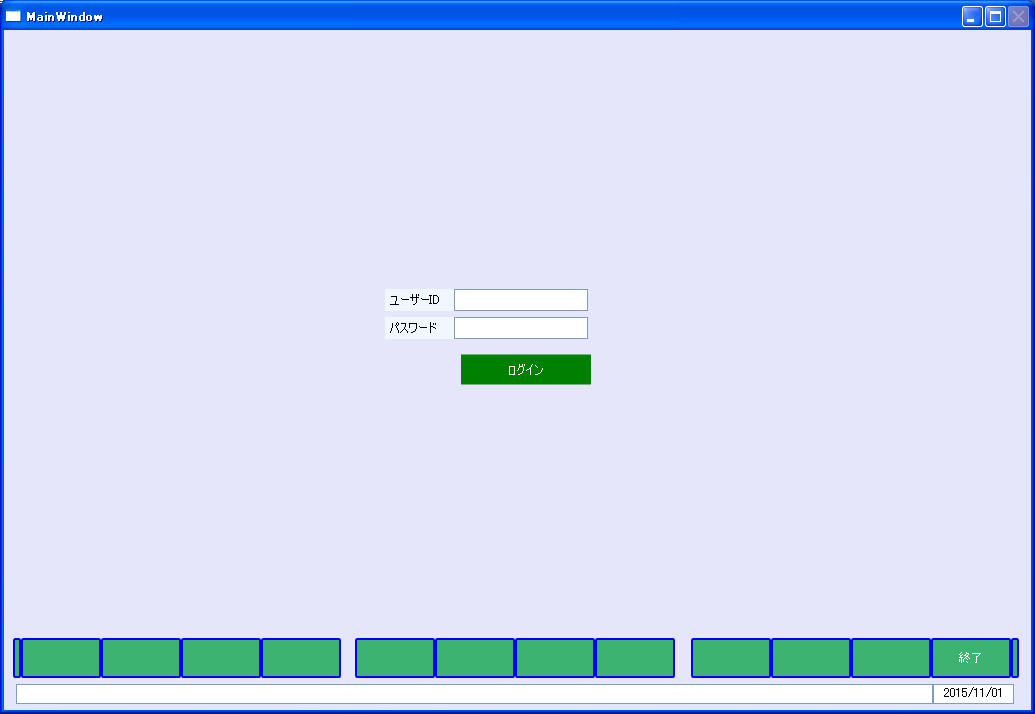
MainWindowでログインボタンを押してWindow2ヘ画面遷移する例のXAMLは下記のようになります。
View
<Window x:Class="LivetWPFApplication100.Views.MainWindow"
        xmlns="http://schemas.microsoft.com/winfx/2006/xaml/presentation"
        xmlns:x="http://schemas.microsoft.com/winfx/2006/xaml"
        xmlns:i="http://schemas.microsoft.com/expression/2010/interactivity"
        xmlns:l="http://schemas.livet-mvvm.net/2011/wpf"
        xmlns:v="clr-namespace:LivetWPFApplication100.Views"
        xmlns:vm="clr-namespace:LivetWPFApplication100.ViewModels"
        xmlns:b="clr-namespace:LivetWPFApplication100.Behaviors"
        Title="MainWindow" Height="714" Width="1035"
        WindowStartupLocation="CenterScreen">

    <Window.Resources>
        <ResourceDictionary>
            <ResourceDictionary.MergedDictionaries>
                <ResourceDictionary Source="/Resources/Styles.xaml"/>
                <ResourceDictionary Source="/Resources/Styles2.xaml"/>
                <ResourceDictionary Source="/Resources/StylesBG.xaml"/>
            </ResourceDictionary.MergedDictionaries>
        </ResourceDictionary>
    </Window.Resources>

    <i:Interaction.Triggers>
        <!--WindowのContentRenderedイベントのタイミングでViewModelの
        Initializeメソッドが呼ばれます-->
        <i:EventTrigger EventName="ContentRendered">
            <l:LivetCallMethodAction MethodTarget="{Binding}"
            MethodName="Initialize"/>
        </i:EventTrigger>

        <l:InteractionMessageTrigger
            MessageKey="MessageKey2" Messenger="{Binding Messenger}">
            <l:TransitionInteractionMessageAction
                WindowType="{x:Type v:Window2}" Mode="Modal"/>
        </l:InteractionMessageTrigger>
    </i:Interaction.Triggers>

    <i:Interaction.Behaviors>
      <b:CloseButtonBehavior IsWindowCloseEnable="{Binding ElementName=CloseCheck,
      Path=IsChecked}"/>
    </i:Interaction.Behaviors>

    <Grid  Background="#FFE6E6FA">

      <Label Background="AliceBlue" Content="ユーザーID" Height="22"
          HorizontalAlignment="Left" Margin="381,259,0,0" Name="label1"
          VerticalAlignment="Top" Width="70" />
      <Label Background="AliceBlue" Content="パスワード" Height="22"
          HorizontalAlignment="Left" Margin="381,287,0,0" Name="label2"
          VerticalAlignment="Top" Width="70" />

      <TextBox InputMethod.PreferredImeState="Off"
          Style="{StaticResource HighlightTextBox}" Height="22"
          HorizontalAlignment="Left" Margin="450,259,429,0" Name="txtユーザーID"
          Text="{Binding Path=txtユーザーID}" VerticalAlignment="Top" Width="134"/>

      <PasswordBox   MaxLength="10"   Height="22" HorizontalAlignment="Left"
          Margin="450,287,0,0" VerticalAlignment="Top" Width="134">
          <i:Interaction.Behaviors>
              <b:PasswordBindBehavior Password="{Binding txtパスワード,
              Mode=TwoWay}" />
          </i:Interaction.Behaviors>
      </PasswordBox>

      <Button Style="{StaticResource CommandTemplate}" Content="ログイン"
          Width="130" Height="30"
          Command="{Binding GotoCommand22}"
          HorizontalAlignment="Center" VerticalAlignment="Center"
          Margin="450,322,433,323" Foreground="White" />

      <v:UserControlFooterN1  Margin="0,0,0,0" HorizontalAlignment="Left"
      VerticalAlignment="Bottom"  />

    </Grid>
</Window>
Windows フォームでは、IME (かな漢字変換) を制御するためにコントロールごとに ImeMode というプロパティが用意されていましたが、WPF の TextBox には、ImeMode プロパティがありません。
WPF では 入力方法を制御するために InputMethod というクラスが用意されています。51行目の「InputMethod.PreferredImeState="Off" 」は、IME を無効にします。
MainWindow.xamlとMainViewModel.csの紐付けは、MainWindow.xamlのコードビハインドファイルであるMainWindow.xaml.csのコンストラクタに「this.DataContext = new MainViewModel();」と記述します。
ViewとViewModelの紐付け
public MainWindow()
{
   InitializeComponent();
   this.DataContext = new MainViewModel();
}
ViewのMainWindowのユーザーID(51~54行)とパスワード(56~62行)はMainViewModelでは変更通知プロパティとして設定する必要があります。
txtユーザーIDとtxtパスワードのプロパティのViewModelでの処理(実装)が下記の変更通知プロパティです。
ViewModel
 #region txtユーザーID変更通知プロパティ
   public string txtユーザーID { get; set; }
   public string txtパスワード { get; set; }
 #endregion
ZAMLのログインのButton(64~68行)をクリックした時の処理(命令)はCommandと呼ばれています。このCommandはViewModelの「GotoCommand22」メソッドと紐付け(Binding)されています。
MainWindowのViewModelであるMainViewModelは下記のようになります。
GotoCommand22(ViewModel)
  public ViewModelCommand GotoCommand22
 {
   get { return new Livet.Commands.ViewModelCommand(Goto22); }
 }
 public void Goto22()
 {
   if (txtユーザーID == null)
   {
     MessageBox.inWShow("ユーザーIDが未入力です");
     return;
   }
   if (txtパスワード == null)
   {
      MessageBox.Show("パスワードが未入力です");
      return;
   }
   if (!作業員マスターログインチェック(txtユーザーID.ToUpper(), txtパスワード))
   {
      MessageBox.Show("ユーザーIDが違うかパスワードが違います");
      return;
   }

      Messenger.Raise(new TransitionMessage(new ViewModel2()
      { NeedHideOwner = true }, "MessageKey2"));
   }
作業員マスターログインチェック
#region 作業員マスターログインチェック
  public bool 作業員マスターログインチェック(string str作業員コード,
  string strパスワード)
  {
    bool bRet = false;

    using (OracleConnection con = new OracleConnection())
    {

       con.ConnectionString = "User Id=UserId; Password=Password;
       			Data Source=DnsName;Pooling=false;";
                con.Open();
                //

                string strSQL = String.Format("SELECT COUNT(*) AS CNT FROM
                作業員マスター Where 作業員コード = '{0}' AND パスワード = '{1}'",
                str作業員コード.ToUpper(), strパスワード);

                OracleCommand oracmd = new OracleCommand(strSQL, con);
                OracleDataReader reader = oracmd.ExecuteReader();

                //*** Tran ***
                //tx.Commit();
                while (reader.Read() == true)
                {
                    if (Convert.ToInt16(reader["CNT"].ToString()) > 0)
                    {
                        bRet = true;
                    }
                }
                return bRet;
            }
        }
        #endregion
UserId、Password、DnsNameは実際のものに置き換えてください。str作業員コード.ToUpper()は、コードを大文字にしています。
遷移先のWindow2のXAMLは下記のようになります。太字部分(LoadedやClosing)はMVVMパターンでは有名な Expression Blend SDK に含まれる System.Windows.Interactivity.dll のクラス (EventTrigger, InvokeAction, Interaction 等)を使用してWPFのコントロールのイベントとViewModel等で公開される ICommand を実装したコマンドプロパティをコードビハインドファイルやハンドラを使用せずにxaml上で関連付ける方法 でSystem.Windows.Interactivity名前空間の EventTrigger クラスの EventName に コマンドと関連付けるイベントを設定し、 InvokeCommandAction によりコマンドとの関連づけを行っています。 ListBoxでは、EventTriggerのEventNameとしては「MouseEnter」、「MouseLeave」、「SelectionChanged」などがあります。
[WPF] コントロールの任意のイベントとコマンド xaml上で関連付けるView
<Window x:Class="LivetWPFApplication100.Views.Window2"
        xmlns="http://schemas.microsoft.com/winfx/2006/xaml/presentation"
        xmlns:x="http://schemas.microsoft.com/winfx/2006/xaml"
        xmlns:i="http://schemas.microsoft.com/expression/2010/interactivity"
        xmlns:l="http://schemas.livet-mvvm.net/2011/wpf"
        xmlns:v="clr-namespace:LivetWPFApplication100.Views"
        xmlns:b="clr-namespace:LivetWPFApplication100.Behaviors"

        Title="Window2" Height="714" Width="1035"
        WindowStartupLocation="CenterScreen">

    <Window.Resources>
        <ResourceDictionary>
            <ResourceDictionary.MergedDictionaries>
                <ResourceDictionary Source="/Resources/Styles.xaml"/>
                <ResourceDictionary Source="/Resources/Styles2.xaml"/>
                <ResourceDictionary Source="/Resources/StylesBG.xaml"/>
            </ResourceDictionary.MergedDictionaries>
        </ResourceDictionary>
    </Window.Resources>

    <i:Interaction.Triggers>
        <!--WindowのContentRenderedイベントのタイミングでViewModelのInitialize
        メソッドが呼ばれます-->
        <i:EventTrigger EventName="ContentRendered">
            <l:LivetCallMethodAction MethodTarget="{Binding}"
          MethodName="Initialize"/>
        </i:EventTrigger>
        <l:InteractionMessageTrigger
            MessageKey="MessageKey3" Messenger="{Binding Messenger}">
            <l:TransitionInteractionMessageAction
                WindowType="{x:Type v:Window3}" Mode="Modal"/>
        </l:InteractionMessageTrigger>

        <i:EventTrigger EventName="Loaded">
            <i:InvokeCommandAction Command="{Binding Path=Loaded}"
              CommandParameter="{Binding Mode=OneTime,
         RelativeSource={RelativeSource Mode=FindAncestor,
          AncestorType={x:Type Window}}}"/>
        </i:EventTrigger>

        <i:EventTrigger EventName="Closing ">
            <i:InvokeCommandAction Command="{Binding Path=Closing}"
            CommandParameter="{Binding Mode=OneTime,
            RelativeSource={RelativeSource Mode=FindAncestor,
            AncestorType={x:Type Window}}}"/>
        </i:EventTrigger>

        <l:InteractionMessageTrigger MessageKey="Close"
          Messenger="{Binding Messenger}">
            <l:WindowInteractionMessageAction/>
        </l:InteractionMessageTrigger>
    </i:Interaction.Triggers>

    <i:Interaction.Behaviors>
      <b:CloseButtonBehavior IsWindowCloseEnable="{Binding ElementName=CloseCheck,
      Path=IsChecked}"/>
    </i:Interaction.Behaviors>

    <Grid  Background="#FFE6E6FA">
        <Button Command="{Binding Path=GotoCommand63-2}" Content="Goto63-2"
        FontSize="16" Foreground="White"  Width="470" Height="35"
        Margin="40,0,503,266" Style="{StaticResource CommandTemplate}"
        VerticalAlignment="Bottom" />
        <v:UserControlFooterN2 Margin="0,0,0,0" HorizontalAlignment="Left"
        VerticalAlignment="Bottom" />
    </Grid>
</Window>
Window2のViewModelであるViewModel2.csは下記のようになります。
ViewModelのコンストラクタでは、画面が呼び出された時は呼び出した親画面をHide(隠し)をします。
この時に、処理が重くて画面にちらつきが生じないないように、33,39,43行目の記述で、親画面のHideを遅らせています。
31,39,58行目を取って、40行目のコメントをはずすと、少々重い画面ですとちらつきが出ます。
開いている画面を閉じる時は48行目で親画面をShow(表示)します。
ViewModel
using System;

// ObservableCollection
using System.Collections.Generic;
using System.Linq;


//INotifyPropertyChanged
//PropertyChanged
using System.ComponentModel;

//参照設定が必要
//using System.Configuration;

using Livet;
using Livet.Commands;
using Livet.Messaging;
//CloseCommand
using Livet.Messaging.Windows;

//ICommand
using System.Windows.Input;

using System.Windows;
using Common;

namespace LivetWPFApplication100.ViewModels
{
    class ViewModel2 : ViewModel
    {
        Window win = null;
        public ViewModel2()
        {
            Loaded = new Livet.Commands.ListenerCommand<Window>((w) =>
            {
                if (NeedHideOwner && w.Owner != null &&
                w.Owner.Visibility == Visibility.Visible)
                {
                	win = w;
                    //w.Owner.Hide();
                }
            });

            Closing = new Livet.Commands.ListenerCommand<Window>((w) =>
            {
                if (NeedHideOwner && w.Owner != null)
                {
                    w.Owner.Show();
                }
            });
        }
        public bool NeedHideOwner { get; set; }
        public ICommand Loaded { get; private set; }
        public ICommand Closing { get; private set; }

        public void Initialize()
        {
            if (win != null) win.Owner.Hide();
            XCloseButtonManager.Disable();
        }